

兄弟👬🏻,当你手里有不少域名,每个域名又配置子域名,那么ssl将是一笔不小的费用。当然各个云厂商,也都有提供免费的ssl证书,但这里有一个问题,就是基本都不提供免费的泛域名证书(免费20个单域名证书),比如 x.gaga.plus、b.gaga.plus 这就要申请2个域名证书了!并且3个月就过期,一年就折腾这,都能折腾哭😭!那咋办?

像我这样做技术分享的,再把一些学习项目部署上线让大家学习体验,站点;https://gaga.plus 就会拆分出不少的子域名,做独立的项目展示。那么就非常需要一款好用的、免费的、泛域名证书,最好还能支持到期自动续期,否则有时候都容易忘记哪个域名忘记更换证书。好在后来找到了一款 https://freessl.cn/ 不过这东西很多伙伴可能不会部署,所以今天给大家分享下,如何配置和使用这块免费的ssl。
文末还有实战项目学习,早早的积累一些各类场景的编程经验,让自己立于不败之地,面试也就不心慌了!
一、产品介绍
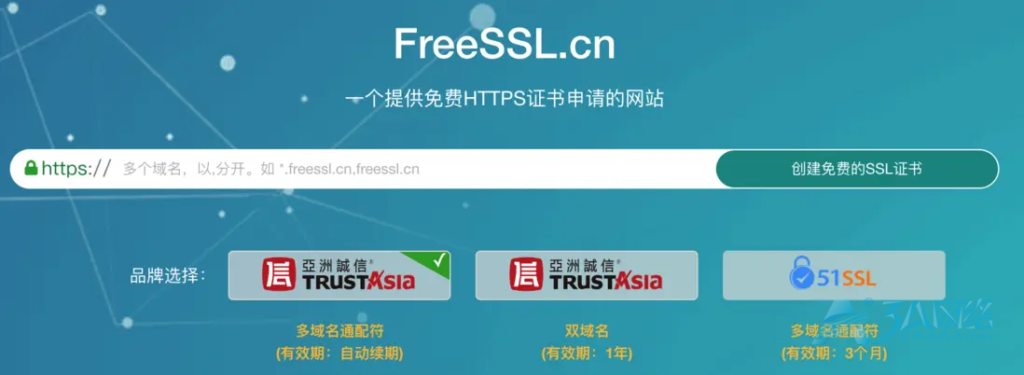
freessl.cn 一个提供免费HTTPS证书申请的网站。已实测体验,确实挺好用。
二、ssl证书
1. 泛域名证书创建
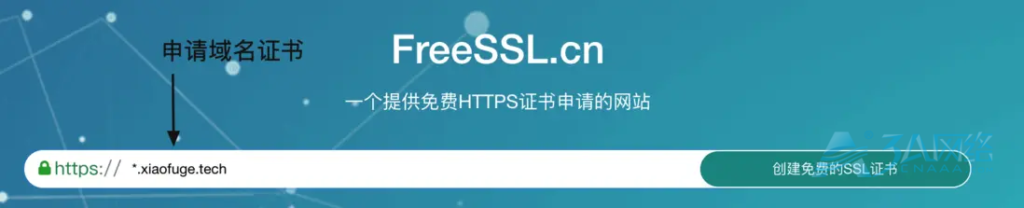
*.xiaofuge.tech 不匹配 xiaofuge.tech 如果有根域名访问,需要单独再申请。
2. dcv 验证(cname)
2.1 获取验证标识
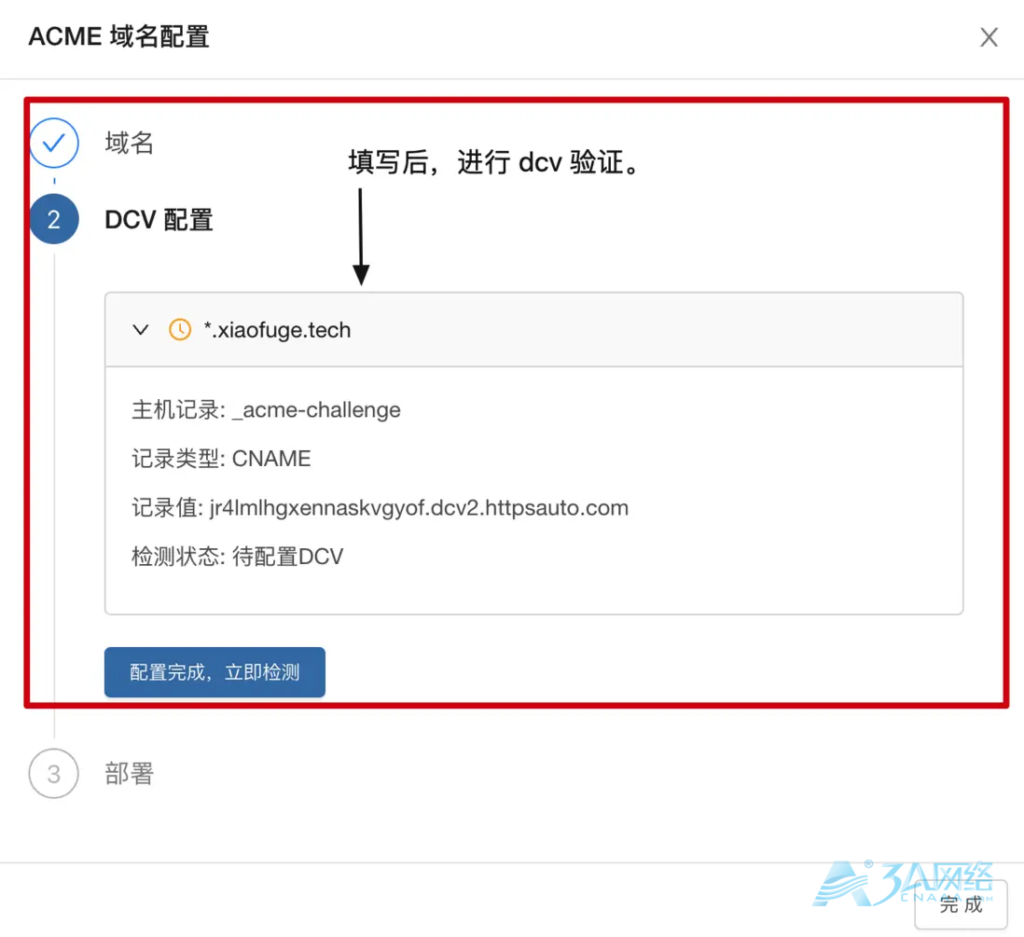
- 选择 cname 方式进行验证。
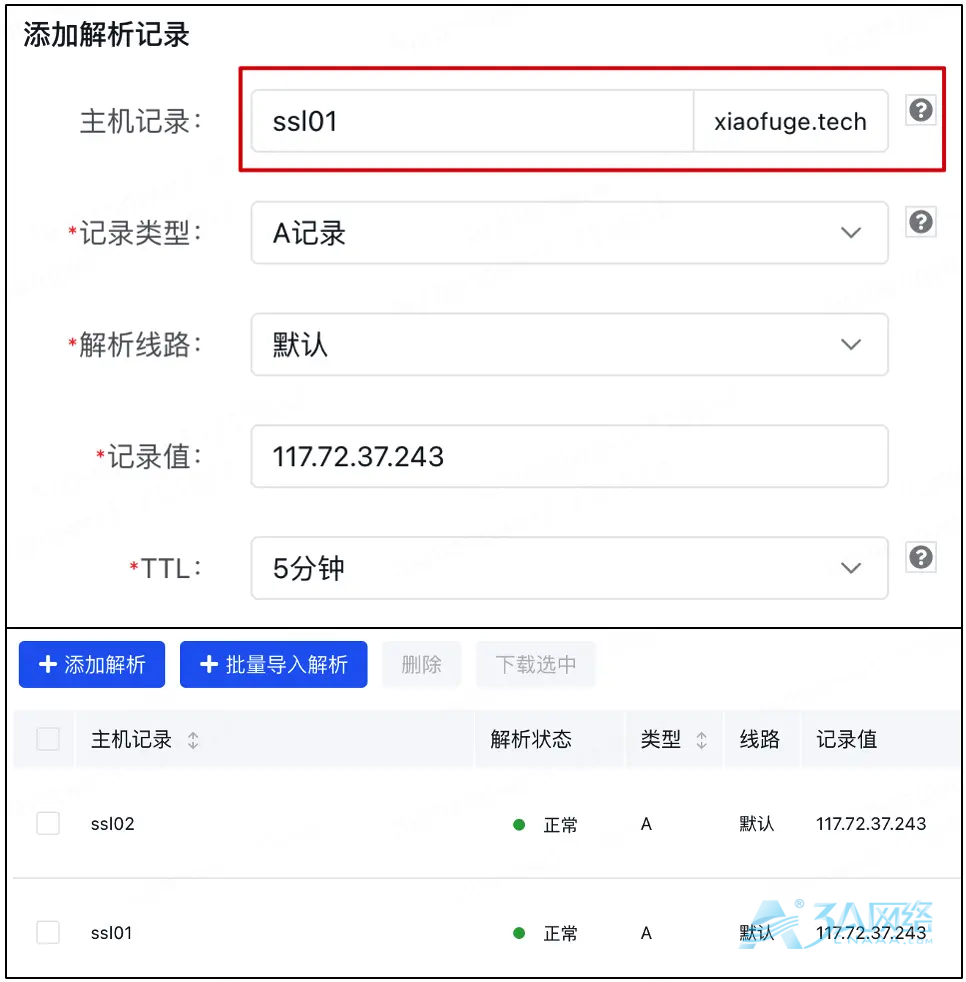
2.2 域名验证配置

- 进入你的域名,配置解析。选择 CNAME 记录类型,填写 freessl 提供给你的记录值进行填写。
2.3 获得部署命令
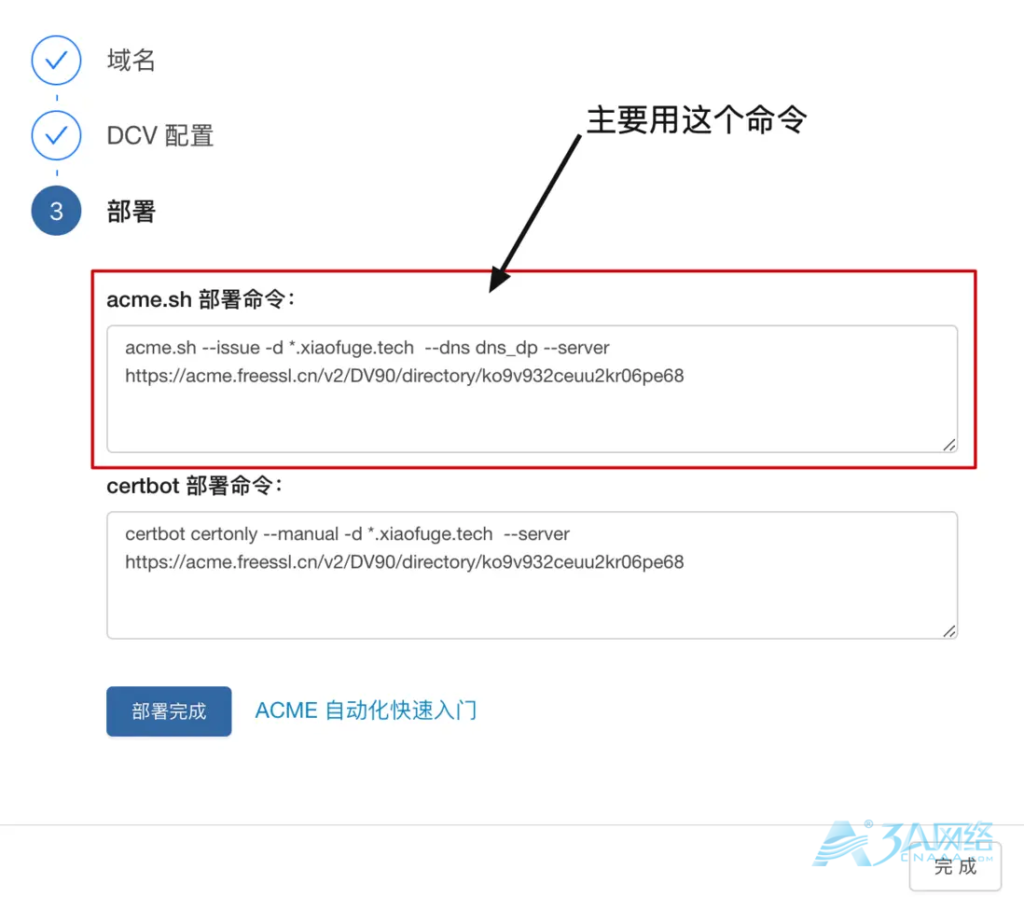
- 点击【配置完成,立即检测】即可获得到部署命令。如果验证失败一种是域名时间未生效,另外就是手残党复制错了。
- 这里主要会用到
acme.sh脚本进行部署。下文部署会进行操作
3. 证书部署
3.1 acme.sh 安装
acme.sh 是一个用于自动化管理和获取SSL/TLS证书的UNIX shell脚本。它使用ACME协议(自动证书管理环境)与证书颁发机构(如Let’s Encrypt)进行交互,以便为网站自动颁发、续签和安装SSL/TLS证书。
[root@lavm-aqhgp9nber ~]# curl https://get.acme.sh | sh -s email=xiaofuge@qq.com  % Total    % Received % Xferd  Average Speed   Time    Time     Time  Current
                                 Dload  Upload   Total   Spent    Left  Speed
100  1032    0  1032    0     0   1337      0 --:--:-- --:--:-- --:--:--  1336
  % Total    % Received % Xferd  Average Speed   Time    Time     Time  Current
                                 Dload  Upload   Total   Spent    Left  Speed
100  218k  100  218k    0     0   1338      0  0:02:46  0:02:46 --:--:--  8442
[Wed Apr 24 22:52:39 CST 2024] Installing from online archive.
[Wed Apr 24 22:52:39 CST 2024] Downloading https://github.com/acmesh-official/acme.sh/archive/master.tar.gz
[Wed Apr 24 22:52:46 CST 2024] Extracting master.tar.gz
[Wed Apr 24 22:52:46 CST 2024] It is recommended to install socat first.
[Wed Apr 24 22:52:46 CST 2024] We use socat for standalone server if you use standalone mode.
[Wed Apr 24 22:52:46 CST 2024] If you don't use standalone mode, just ignore this warning.
[Wed Apr 24 22:52:46 CST 2024] Installing to /root/.acme.sh
[Wed Apr 24 22:52:46 CST 2024] Installed to /root/.acme.sh/acme.sh
[Wed Apr 24 22:52:46 CST 2024] Installing alias to '/root/.bashrc'
[Wed Apr 24 22:52:46 CST 2024] OK, Close and reopen your terminal to start using acme.sh
[Wed Apr 24 22:52:46 CST 2024] Installing alias to '/root/.cshrc'
[Wed Apr 24 22:52:46 CST 2024] Installing alias to '/root/.tcshrc'
[Wed Apr 24 22:52:46 CST 2024] Installing cron job
no crontab for root
no crontab for root
[Wed Apr 24 22:52:46 CST 2024] Good, bash is found, so change the shebang to use bash as preferred.
[Wed Apr 24 22:52:48 CST 2024] OK
[Wed Apr 24 22:52:48 CST 2024] Install success!- 注意安装完成后执行;
source ~/.bashrc这样才能生效 acme.sh 配置 - 安装过程有点慢,需要等待下 Install success! 安装完成。目前官网提供的镜像地址不太好用。
3.2 证书安装
用你在 2.3 步骤获取的命令进行安装。
acme.sh --issue -d *.xiaofuge.tech --dns dns_dp --server https://acme.freessl.cn/v2/DV90/directory/ko9v932ceuu2kr06pe68
- 执行命令后,完成安装即可获得
*.cer、*.key两个文件地址。这个就是用于配置 ssl 域名证书的。
三、域名配置
四、Nginx 配置
1. 脚本工程
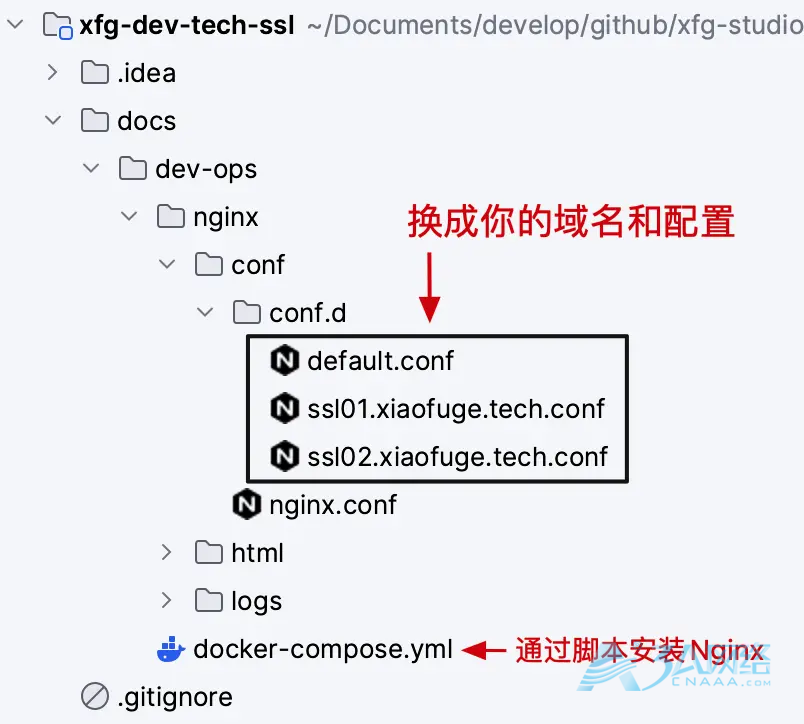
- 工程:https://gitcode.net/KnowledgePlanet/road-map/xfg-dev-tech-ssl
- 说明:工程中提供了Nginx配置的初始信息,你只需要参考修改为自己的域名后,执行
docker-compose.yml即可安装 Nginx
1.1 修改域名
server {
    listen       80;
    listen  [::]:80;
    server_name  ssl01.xiaofuge.tech;

    rewrite ^(.*) https://$server_name$1 permanent;

}

server {
    listen       443 ssl;
    server_name  ssl01.xiaofuge.tech;

    ssl_certificate      /root/.acme.sh/*.xiaofuge.tech_ecc/*.xiaofuge.tech.cer;
    ssl_certificate_key  /root/.acme.sh/*.xiaofuge.tech_ecc/*.xiaofuge.tech.key;

    ssl_session_cache    shared:SSL:1m;
    ssl_session_timeout  5m;

    ssl_ciphers  HIGH:!aNULL:!MD5;
    ssl_prefer_server_ciphers  on;

    location / {
        proxy_set_header   X-Real-IP         $remote_addr;
        proxy_set_header   Host              $http_host;
        proxy_set_header   X-Forwarded-For   $proxy_add_x_forwarded_for;
        root   /usr/share/nginx/html;
        index  index.html index.htm;
    }

    error_page   500 502 503 504  /50x.html;
    location = /50x.html {
        root   /usr/share/nginx/html;
    }
}- 首先,修改
ssl01.xiaofuge.tech为你的域名。 - 之后,修改 ssl 地址信息。这个地址是 docker-compose 映射的地址。如果你是 linux 直接安装,则可以直接使用 acme.sh 安装的时候生成的地址。
- 注意,更多 Nginx 配置 https://bugstack.cn/md/road-map/nginx.html
1.2 修改ssl
version: '3'
# docker-compose -f docker-compose.yml up -d
services:
  nginx:
    image: nginx:1.25.3
    container_name: nginx
    ports:
      - '443:443'
      - '80:80'
    volumes:
      - './nginx/logs:/var/log/nginx'
      - './nginx/html:/usr/share/nginx/html'
      - './nginx/conf/nginx.conf:/etc/nginx/nginx.conf'
      - './nginx/conf/conf.d:/etc/nginx/conf.d'
      - '/root/.acme.sh/*.xiaofuge.tech_ecc/*.xiaofuge.tech.cer:/root/.acme.sh/*.xiaofuge.tech_ecc/*.xiaofuge.tech.cer'
      - '/root/.acme.sh/*.xiaofuge.tech_ecc/*.xiaofuge.tech.key:/root/.acme.sh/*.xiaofuge.tech_ecc/*.xiaofuge.tech.key'
    privileged: true
restart: always- 修改 docker-compose 文件中 cer和 key 的地址。基本就是
xiaofuge.tech名称的变化
2. 上传文件
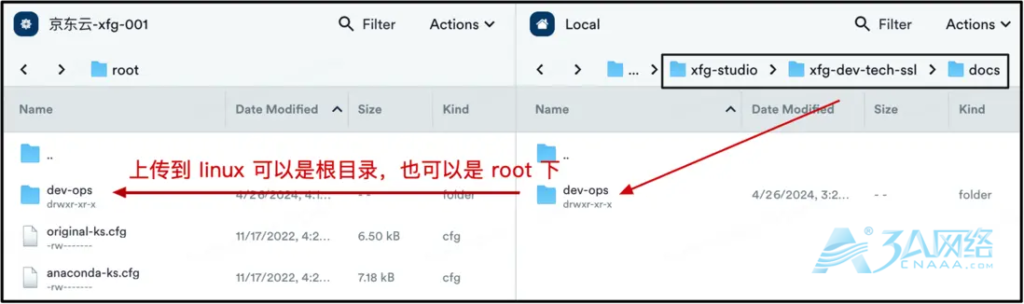
- 配置信息全部修改后,上传到你的云服务器上。有些东西还是要云服务器锻炼,这里推荐 https://yun.xfg.plus 2c2g 50元一年。
3. 执行脚本
[root@lavm-aqhgp9nber ~]# cd dev-ops/
[root@lavm-aqhgp9nber dev-ops]# chmod +x docker-compose.yml
[root@lavm-aqhgp9nber dev-ops]# docker-compose -f docker-compose.yml up -d
[+] Running 1/1
✔ Container nginx Started 
安装完成后,可以看到 443、80 端口正常启动。如果安装失败,则可以检查下日志。
五、访问验证
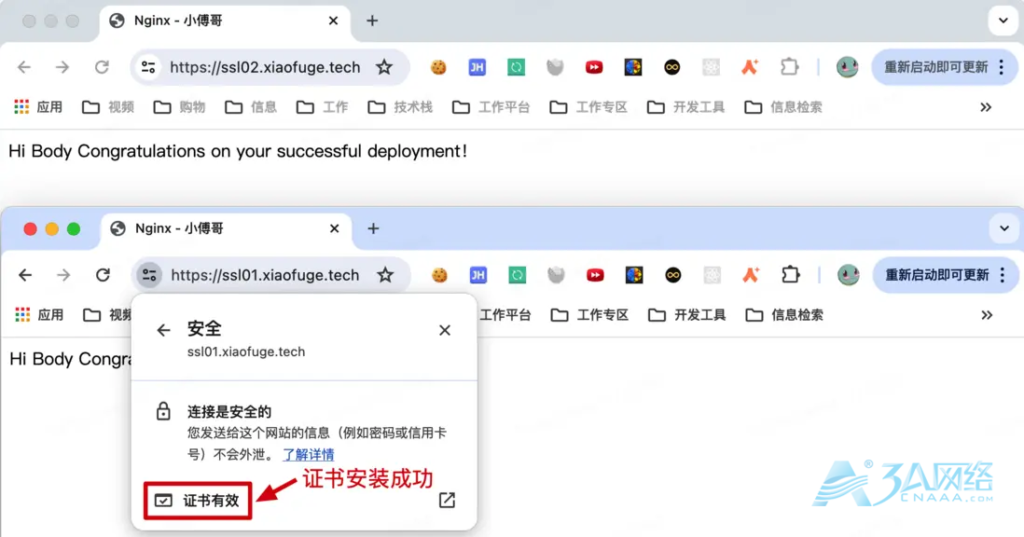
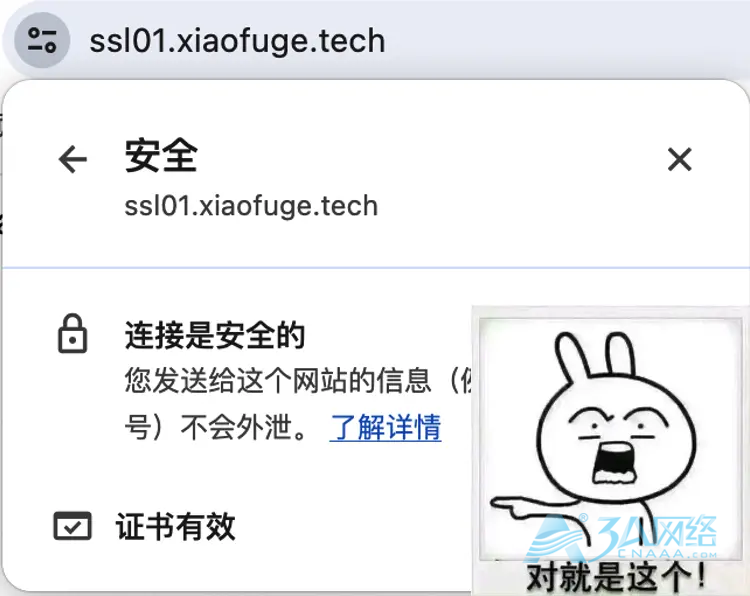
- 访问地址;
https://ssl01.xiaofuge.tech/、https://ssl02.xiaofuge.tech/验证证书是否部署成功。 - 如图,验证结果符合预期。
文章来源:https://www.cnaaa.net,转载请注明出处:https://www.cnaaa.net/archives/11935