

- yum自动安装,不支持自由扩展第三方功能
- 源码编译安装,可以指定安装路径,并支持自由安装模块
安装前准备
- 安装GCC编译环境
[root@localhost ~]# yum install -y gcc gcc-c++ autoconf automake make- 安装模块依赖
Nginx支持的功能模块需要有第三方的库支持,例如gzip的zlib库,rewrite重写需要的pcre库,HTTPS需要的openssl库等等。
[root@localhost ~]# yum install zlib zlib-devel openssl openssl-devel pcre pcre-devel wget httpd-tools vim -y
如果出现报错
错误: Multilib version problems found. This often means that the root
      cause is something else and multilib version checking is just
      pointing out that there is a problem. Eg.:

        1. You have an upgrade for zlib which is missing some
           dependency that another package requires. Yum is trying to
           solve this by installing an older version of zlib of the
           different architecture. If you exclude the bad architecture
           yum will tell you what the root cause is (which package
           requires what). You can try redoing the upgrade with
           --exclude zlib.otherarch ... this should give you an error
           message showing the root cause of the problem.

        2. You have multiple architectures of zlib installed, but
           yum can only see an upgrade for one of those architectures.
           If you don't want/need both architectures anymore then you
           can remove the one with the missing update and everything
           will work.

        3. You have duplicate versions of zlib installed already.
           You can use "yum check" to get yum show these errors.

      ...you can also use --setopt=protected_multilib=false to remove
      this checking, however this is almost never the correct thing to
      do as something else is very likely to go wrong (often causing
      much more problems).

      保护多库版本:zlib-1.2.7-20.el7_9.x86_64 != zlib-1.2.7-19.el7_9.i686
可以在后面添加命令 –setopt=protected_multilib=false
[root@localhost nginx-1.22.0]# yum install zlib zlib-devel Openssl openssl-devel pcre pcre-devel wget httpd-tools vim -y --setopt=protected_multilib=false
- 安装系统基础开发环境
[root@localhost ~]# yum groupinstall "Development Tools" "Basic Web Server"
- 创建管理用户
[root@localhost ~]# useradd -s /sbin/nologin nginx下载安装包
- 创建nginx文件夹,存储下载文件
[root@localhost ~]# mkdir nginx
[root@localhost ~]# ls
anaconda-ks.cfg  nginx  perl5
- 从nginx官网下载安装包,本教程的安装包为nginx1.22
[root@localhost nginx]# wget http://nginx.org/download/nginx-1.22.0.tar.gz
--2022-06-17 21:45:11--  http://nginx.org/download/nginx-1.22.0.tar.gz
正在解析主机 nginx.org (nginx.org)... 52.58.199.22, 3.125.197.172, 2a05:d014:edb:5702::6, ...
正在连接 nginx.org (nginx.org)|52.58.199.22|:80... 已连接。
已发出 HTTP 请求,正在等待回应... 200 OK
长度:1073322 (1.0M) [application/octet-stream]
正在保存至: “nginx-1.22.0.tar.gz”

100%[==================================================>] 1,073,322    823KB/s 用时 1.3s

2022-06-17 21:45:13 (823 KB/s) - 已保存 “nginx-1.22.0.tar.gz” [1073322/1073322])

[root@localhost nginx]# ls
nginx-1.22.0.tar.gz
- 使用tar命令,解压到当前文件夹
[root@localhost nginx]# tar -zxf nginx-1.22.0.tar.gz
[root@localhost nginx]# ll
总用量 1056
drwxr-xr-x. 8 1001 1001    4096 5月  24 07:59 nginx-1.22.0
-rw-r--r--. 1 root root 1073322 5月  24 22:29 nginx-1.22.0.tar.gz
- 让vim系统识别Nginx语法
[root@localhost nginx]# cd nginx-1.22.0/
[root@localhost nginx-1.22.0]# ls
auto  CHANGES  CHANGES.ru  conf  configure  contrib  html  LICENSE  man  README  src
[root@localhost nginx-1.22.0]# mkdir ~/.vim
[root@localhost nginx-1.22.0]# cp -r contrib/vim/* ~/.vim/
编译安装三部曲
- 编译Nginx,扩展编译模块
[root@localhost nginx-1.22.0]# ./configure --help  # 列出Nginx的编译选项,如制定安装路径,配置文件、日志文件等路径,指定开启模块功能等

[root@localhost nginx-1.22.0]# ./configure --prefix=/opt/Nginx1.22/ --with-http_ssl_module  --with-http_flv_module --with-http_gzip_static_module --with-http_stub_status_module  --with-threads  --with-file-aio
- 执行make,进行编译
[root@localhost nginx-1.22.0]# make- make install 进行安装
[root@localhost nginx-1.22.0]# make install配置Nginx环境变量
- 检查Prefix指定的安装目录
[root@localhost /]# ll opt
总用量 0
drwxr-xr-x. 2 root root 18 6月  15 18:16 linux_ic
drwxr-xr-x. 6 root root 50 6月  17 22:36 Nginx1.22
drwxr-xr-x. 2 root root  6 10月 31 2018 rh
- Nginx的程序目录
[root@localhost /]# cd /opt/Nginx1.22/
[root@localhost Nginx1.22]# pwd
/opt/Nginx1.22
[root@localhost Nginx1.22]# ls
conf  html  logs  sbin
- conf:配置文件目录
- html:静态文件
- logs:日志文件目录
- sbin:二进制命令文件
- 创建系统服务
[root@localhost ~]# echo export PATH=/opt/Nginx1.22/sbin:$PATH > /etc/profile.d/nginx.sh
- 重新登录终端,查看环境变量
[root@localhost ~]# echo $PATH
/root/perl5/bin:/opt/Nginx1.22/sbin:/root/perl5/bin:/usr/local/sbin:/usr/local/bin:/usr/sbin:/usr/bin:/root/bin:/root/bin
- 检查nginx版本和安装模块
[root@localhost ~]# nginx -V
nginx version: nginx/1.22.0
built by gcc 4.8.5 20150623 (Red Hat 4.8.5-44) (GCC)
built with OpenSSL 1.0.2k-fips  26 Jan 2017
TLS SNI support enabled
configure arguments: --prefix=/opt/Nginx1.22/ --with-http_ssl_module --with-http_flv_module --with-http_gzip_static_module --with-http_stub_status_module --with-threads --with-file-aio
启动nginx
- 使用nginx命令启动
[root@localhost ~]# nginx
[root@localhost ~]# ps -ef | grep nginx
root     44184     1  0 23:09 ?        00:00:00 nginx: master process nginx
nobody   44185 44184  0 23:09 ?        00:00:00 nginx: worker process
root     44430 40561  0 23:09 pts/0    00:00:00 grep --color=auto nginx
[root@localhost ~]# netstat -tunlp |grep nginx
tcp        0      0 0.0.0.0:80              0.0.0.0:*               LISTEN      44184/nginx: master
- 开放系统80端口
[root@localhost ~]# firewall-cmd --zone=public --add-port=80/tcp --permanent
success
[root@localhost ~]# firewall-cmd --reload
success
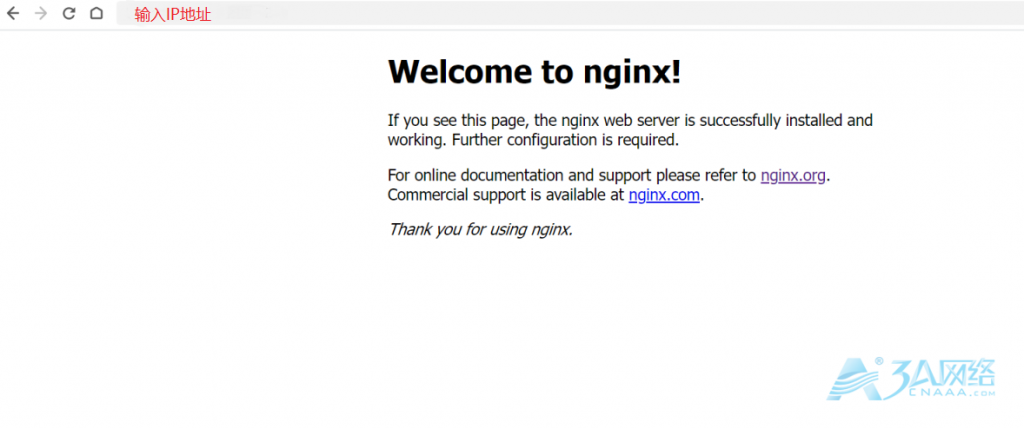
- 在浏览器中输入IP地址

文章来源:https://www.cnaaa.net,转载请注明出处:https://www.cnaaa.net/archives/4765


评论列表(1条)
[…] NGINX的搭建:https://www.cnaaa.net/archives/4765 […]